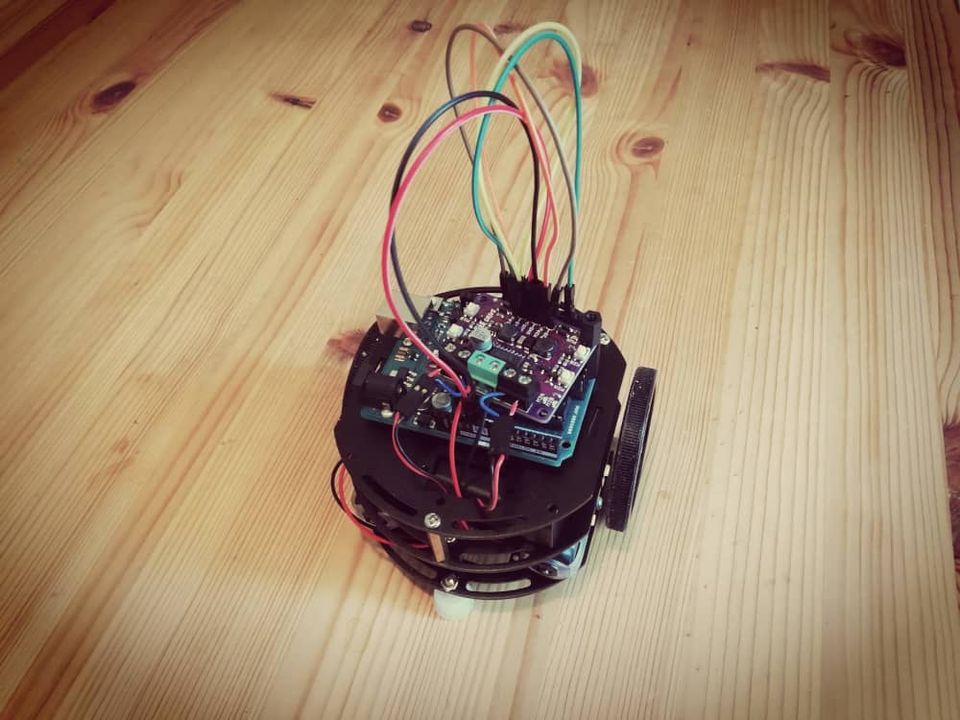
Simple Arduino Robot Car For Beginners
This is an older post from when this site covered general embedded learning. The site now focuses on modernising classic vehicles.
Required Components
- A chassis (I'm using this kit)
- Arduino Uno
- Maker Drive motor driver
- Batteries (Example: 4 x AA batteries)
- 2 x DC Motors (If not included in your chassis kit)
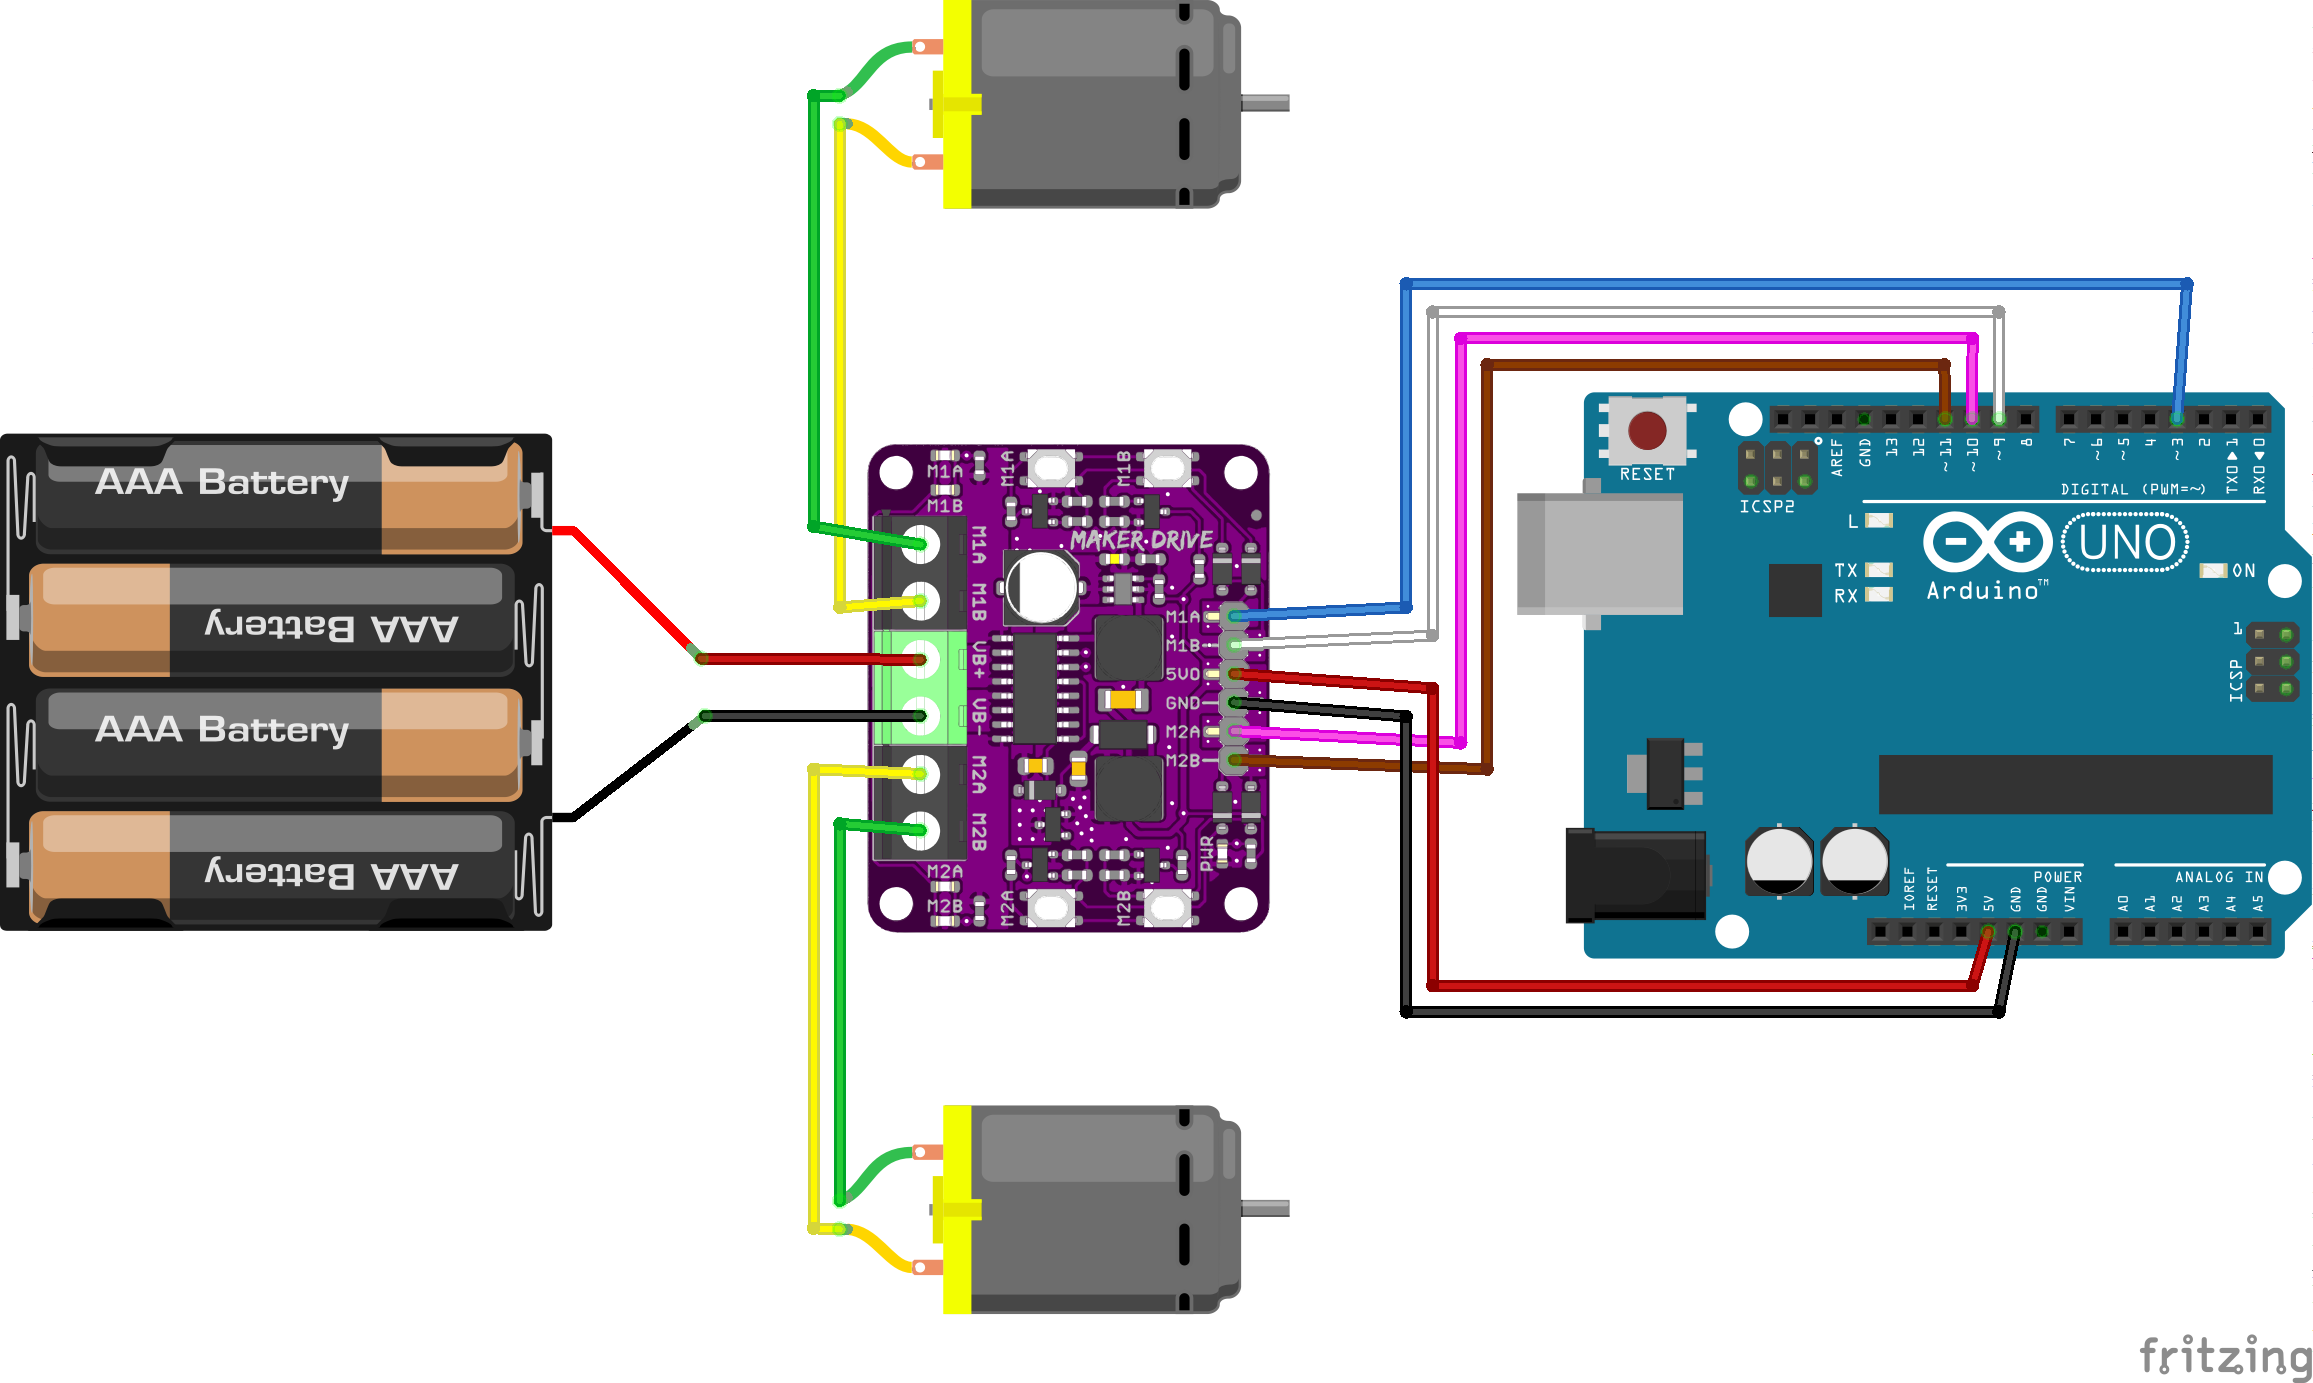
Circuit Diagram
Code
The code is based on the code example from Cytron, the provider of the Maker Drive motor driver.
I've made a few changes to it to try it out and let the car do something a little bit different.
In this code, the car drives around in a right-handed circle:
Click to see some code
#include "CytronMotorDriver.h"

// Configure the motor driver.
CytronMD motor1(PWM_PWM, 3, 9);   // PWM 1A = Pin 3, PWM 1B = Pin 9.
CytronMD motor2(PWM_PWM, 10, 11); // PWM 2A = Pin 10, PWM 2B = Pin 11.

// The setup routine runs once when you press reset.
void setup() {
}

// The loop routine runs over and over again forever.
void loop() {
    robotStop();
    delay(1000);
    for (int i = 0; i < 4; i++)
    {
        robotForward();
        delay(1000);
        robotTurnRight();
        delay(1000);
    }
}

void robotStop()
{
    motor1.setSpeed(0);     // Motor 1 stops.
    motor2.setSpeed(0);     // Motor 2 stops.
}

void robotForward()
{
    motor1.setSpeed(150);   // Motor 1 runs forward.
    motor2.setSpeed(150);   // Motor 2 runs forward.
}

void robotReverse()
{
    motor1.setSpeed(-150);   // Motor 1 runs backward.
    motor2.setSpeed(-150);   // Motor 2 runs backward.
}

void robotTurnLeft()
{
    motor1.setSpeed(150);    // Motor 1 runs forward.
    motor2.setSpeed(-150);   // Motor 2 runs backward.
}

void robotTurnRight()
{
    motor1.setSpeed(-150);   // Motor 1 runs backward.
    motor2.setSpeed(150);    // Motor 2 runs forkward.
}
Running the motors without the Arduino
The Maker Drive motor driver is great to get started for beginners. It has a simple design and is quite easy to use. It also has great documentation, which is always helpful.
The first thing to do is to connect batteries and the motors to the driver and test it to ensure everything works.
As per the diagram above, connecting the motors and battery to the driver is rather simple.
Connect the battery to the power input terminal (green) and the motors to each motor output terminal (black).
Once everything is connected, you can test the driver and make sure the motors run. You can do that by pushing the white buttons on the driver. See the video below:
Motor running with Maker Drive
You should also see the small LEDs light up when the buttons are pressed. So if you are having trouble, it can be useful for debugging.
Once you've verified that everything works, you can start connecting the Arduino.
Connecting the Arduino
Cool, the motors are working!
Now, we need something to control them. That's where the Arduino comes in.
To connect the Arduino, you can use the below table and the diagram at the top as guidance.
Connections:
| Maker Drive | Arduino UNO |
|---|---|
| M1A | Pin 3 |
| M1B | Pin 9 |
| 5V | 5V |
| GND | GND |
| M2A | Pin 10 |
| M2B | Pin 11 |
When all the things are connected, you can then upload the code to the Arduino, and your car will soon after start going in circles:
Completed DIY robot car going in circles!
Thanks
Woohoo, it works!
Unfortunately, I forgot to record a video of the car driving with the latest code changes, but I do hope you've enjoyed that :)
I'll soon be coming out with an article on how to use a pyboard instead of the Arduino board to get familiar with another microcontroller.
If you're having any troubles connecting and setting it up, I can also recommend this video from Cytron on getting started with the Make Drive with an Arduino.
Thank you for reading.


Comments ()