Motor Speed Control using an Arduino Uno
This is an older post from when this site covered general embedded learning. The site now focuses on modernising classic vehicles.
Below we'll demonstrate how to control the speed of your DC motor using an Arduino Uno and an L293D H-Bridge. The H-Bridge is also capable of controlling two motors at the same time. (Not demoed below)
Using the Serial Monitor, you'll be able to send a certain character to your Arduino to set the desired speed. These can, of course, be changed in the code to your needs.
Required Components
- Arduino Uno
- L293D H-Bridge Driver
- DC motor
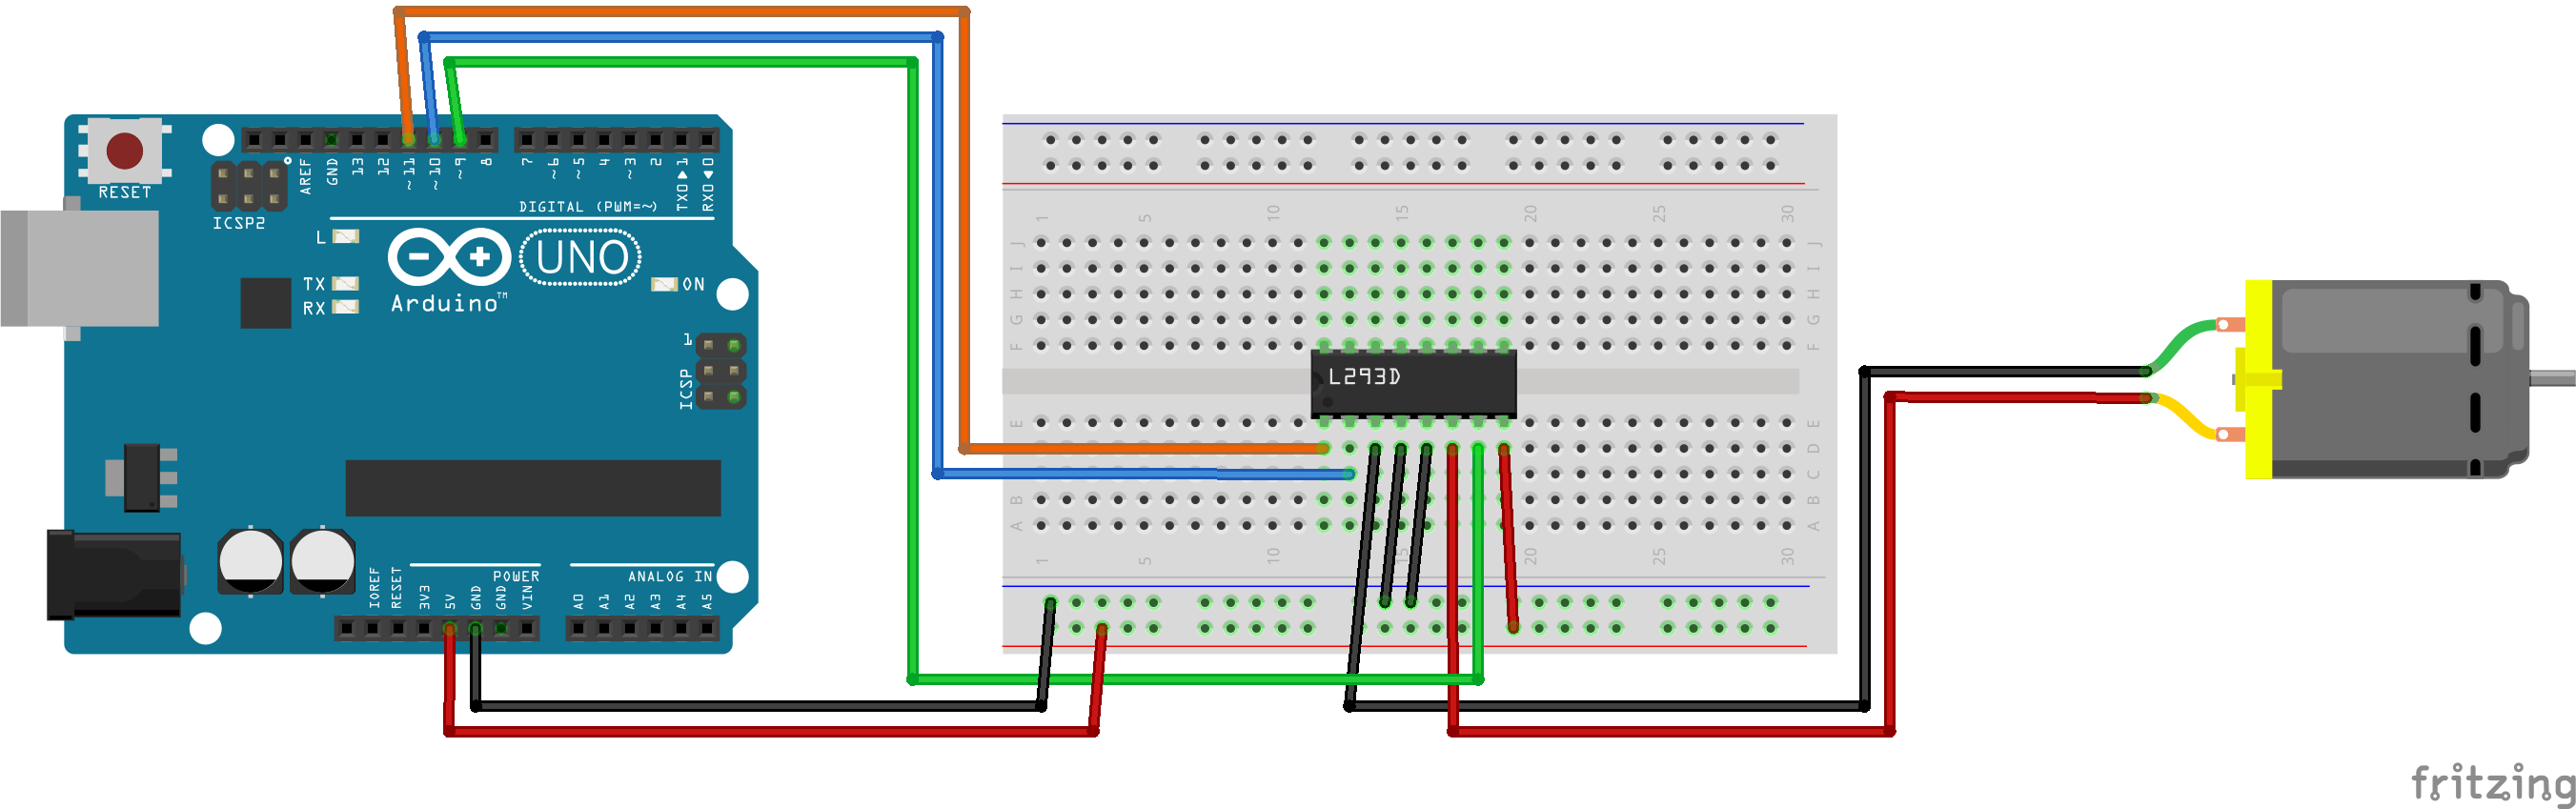
Circuit Diagram
Code
Click to see some code.
//Motor_1 Connection
#define ENABLE_1    11
#define MOTOR_1_A   10
#define MOTOR_1_B   9

//other variables
char serial_data;

void setup()
{
    Serial.begin(9600);
    Serial.println("Motor Init..");
    motor_1_init();
    Serial.println("Motor Ready!");
}


void loop()
{
    while (Serial.available())
    {
      serial_data = Serial.read();
      switch (serial_data)
      {
        case 'w':
            analogWrite(ENABLE_1, 255);
            digitalWrite(MOTOR_1_A, HIGH);
            digitalWrite(MOTOR_1_B, LOW);
            Serial.println("100% forward Motor_1");
            break;
        case 'e':
            analogWrite(ENABLE_1, 128);
            digitalWrite(MOTOR_1_A, HIGH);
            digitalWrite(MOTOR_1_B, LOW);
            Serial.println("50% Forward Motor_1");
            break;
        case 's':
            analogWrite(ENABLE_1, 0);
            digitalWrite(MOTOR_1_A, HIGH);
            digitalWrite(MOTOR_1_B, LOW);
            Serial.println("0% forward Motor_1");
            break;
        case 'd':
            analogWrite(ENABLE_1, 128);
            digitalWrite(MOTOR_1_A, LOW);
            digitalWrite(MOTOR_1_B, HIGH);
            Serial.println("50% Backward Motor_1");
            break;
        case 'f':
            analogWrite(ENABLE_1, 255);
            digitalWrite(MOTOR_1_A, LOW);
            digitalWrite(MOTOR_1_B, HIGH);
            Serial.println("100% Backward Motor_1");
            break;
        default:
            break;
        }
    }
}

 //-------------- functions -------------------------------------

void motor_1_init()
{
  pinMode(MOTOR_1_A, OUTPUT);
  pinMode(MOTOR_1_B, OUTPUT);
  pinMode(ENABLE_1, OUTPUT);

  digitalWrite(MOTOR_1_A, LOW);
  digitalWrite(MOTOR_1_B, LOW);
  analogWrite(ENABLE_1, LOW);
}
Wiring
Using the L293D datasheet and the documentation for Arduino Uno, you can find out pin definitions and how to connect them.
See the table below for how I did it:
| L293D H-Bridge | Arduino Uno | DC Motor |
|---|---|---|
| Enable 1 | 11 | - |
| Input 1 | 10 | - |
| Output 1 | - | V- |
| GND | GND | - |
| GND | GND | - |
| Output 2 | - | V+ |
| Input 2 | 9 | - |
| Vs | 5V | - |
You can also use this driver, L293D, to drive two motors at once. Check the datasheet to see how to connect it; it's very similar.
Results
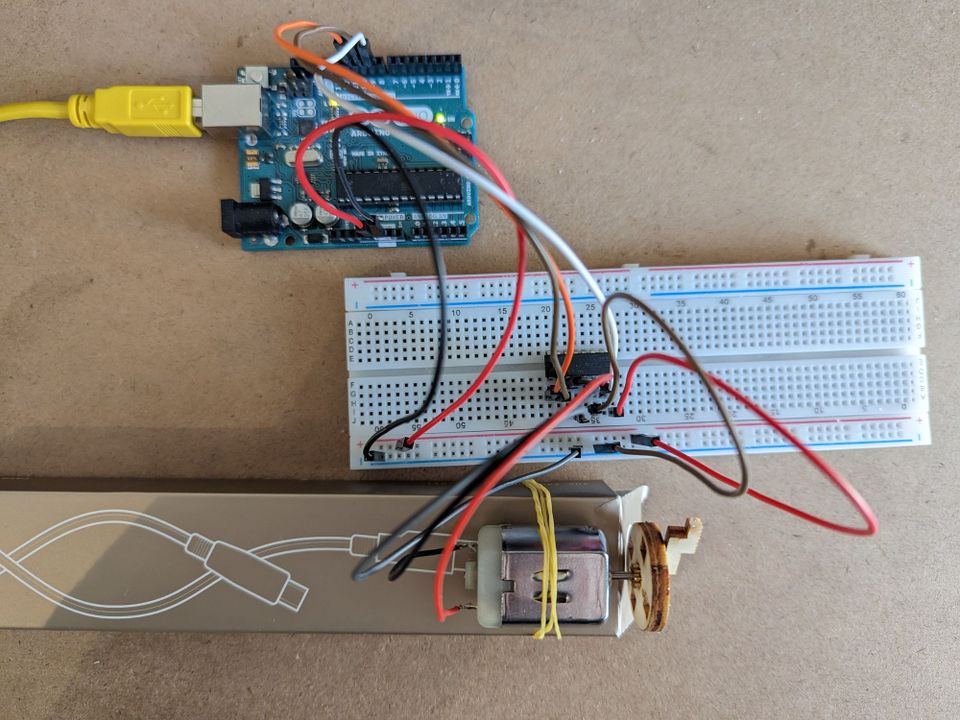
Here you can see a video of the motor running the above setup.
Video of the Arduino Uno & L293S driver running a DC motor with different speeds
Thank you for reading!
Hopefully, this has given you a decent starting point for your own project.


Comments ()