I2C Communication Between Arduino Uno and Feather 32u4

This is an older post from when this site covered general embedded learning. The site now focuses on modernising classic vehicles.
In this article, we'll go over an example of how to communicate between an Arduino Uno and an Adafruit Feather 32u4 using the I2C protocol.
We'll use a distance sensor to create values, which the Feather 32u4 receives and sends to the Arduino.
Because the distance sensor requires 5V and the battery connected to the Feather is 3.7V, we'll need to use a Step-Up Voltage Regulator to provide the sensor with the voltage needed.
Once the Arduino gets the values it will print them out on the Serial Monitor.
Required Components
Optional Components
- HC-SR04 Ultrasonic Sonar Distance Sensor
- Step-Up Voltage Regulator (Pololu 5V 3A S13V30F5)
Circuit Diagram
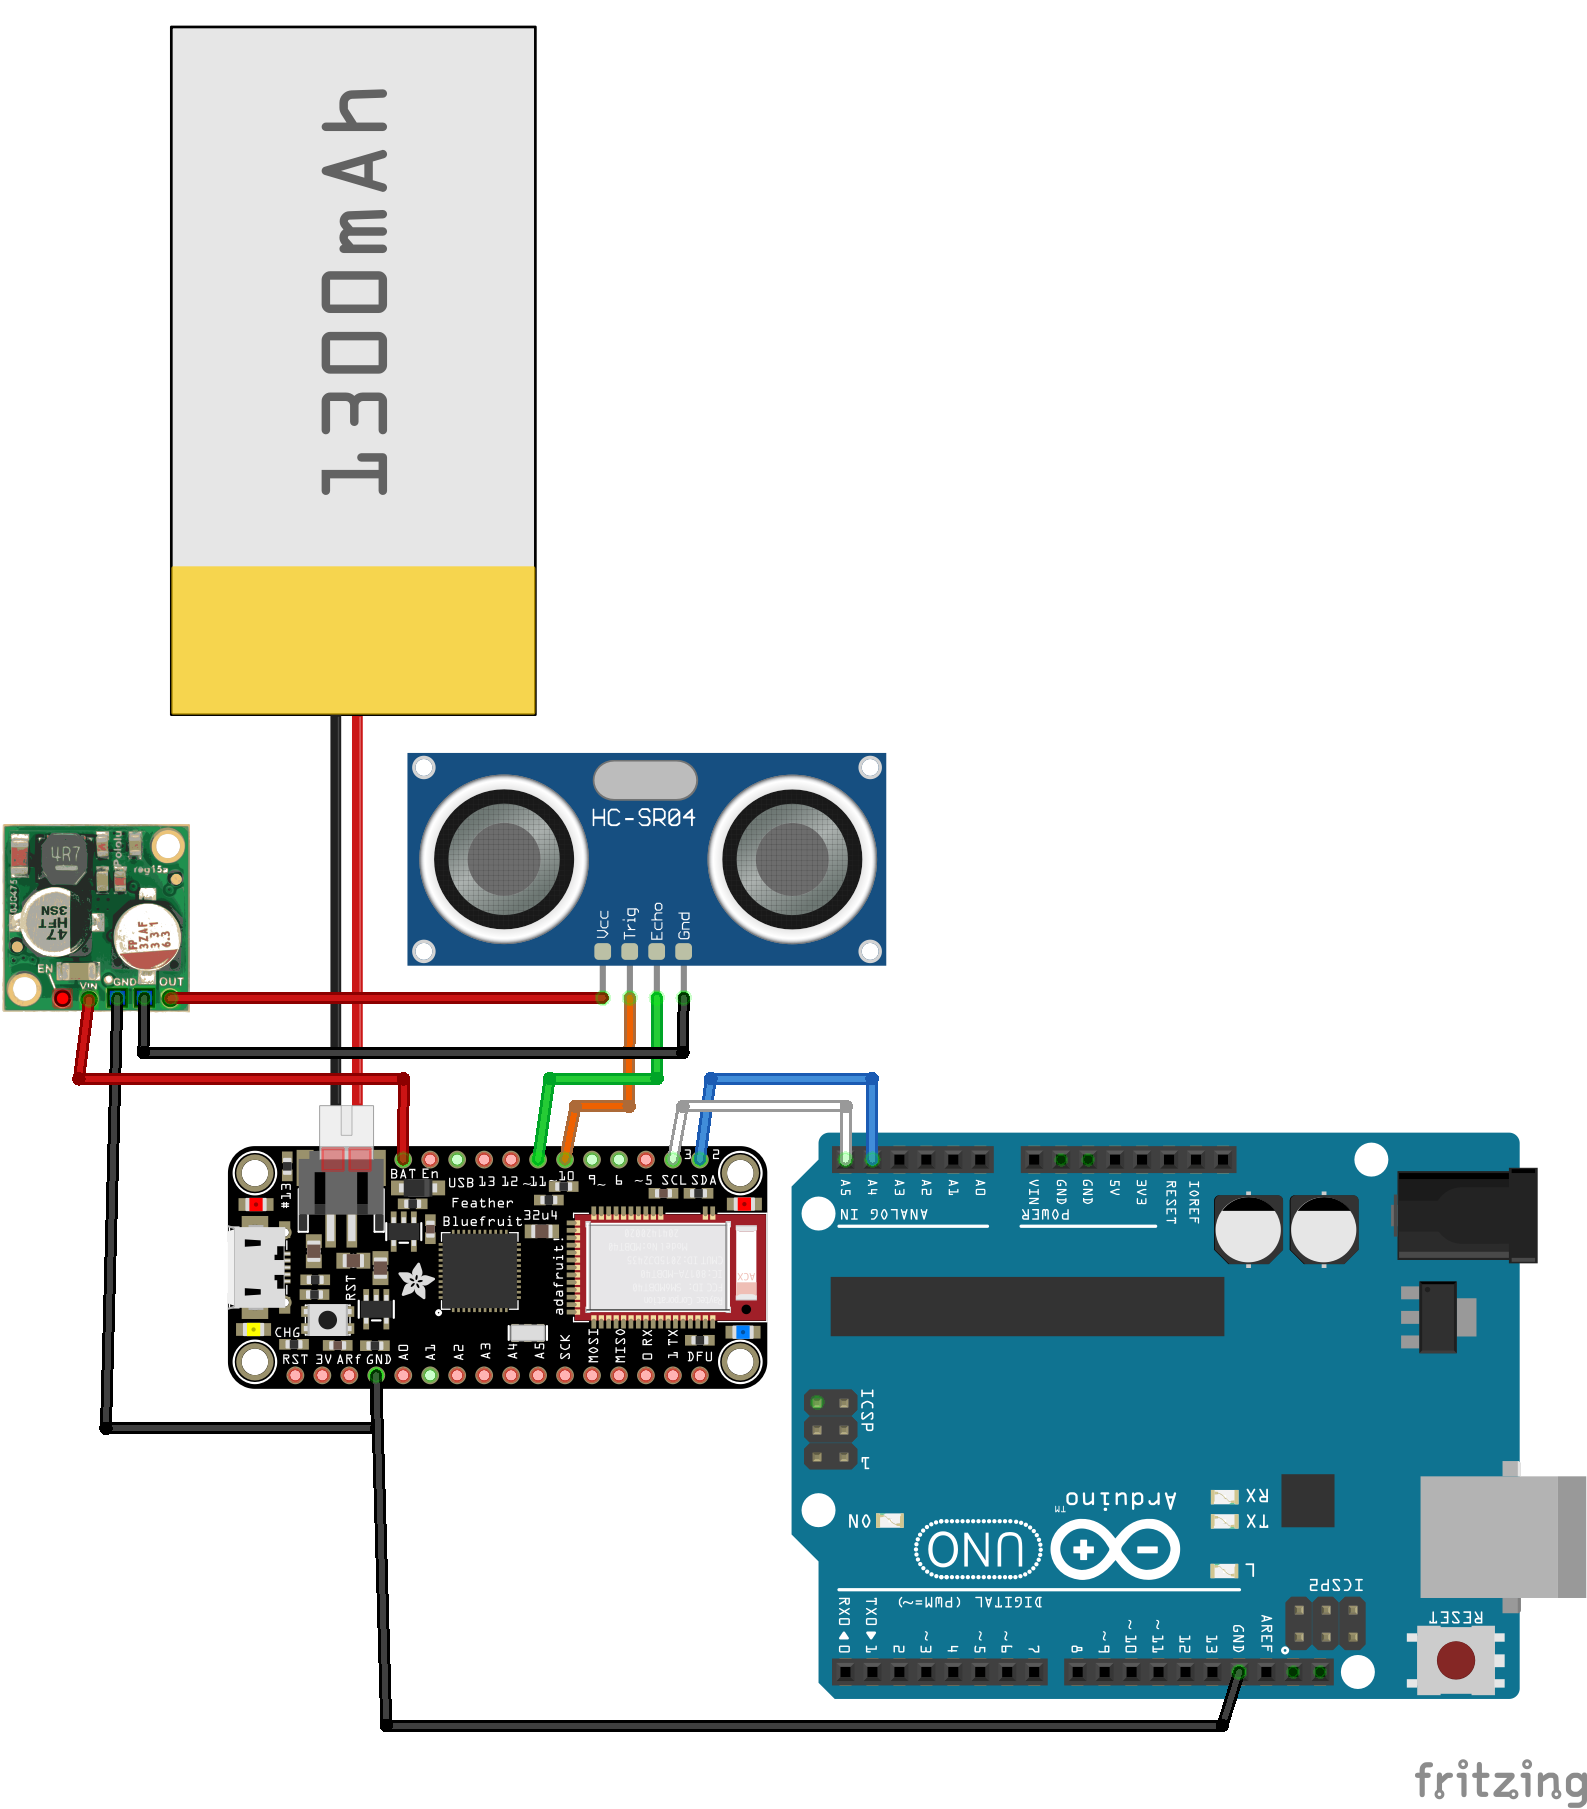
Note: In the image above, what represents the Step-Up Voltage Regulator is an image of a Step-Down Voltage Regulator. But the connections are the same.
Code (Arduino)
Click to see some code.
#include <Wire.h>

char inData[] = {'0','0'};
byte index = 0;

void setup() {
  Wire.begin();        // join i2c bus (address optional for master)
  Serial.begin(9600);  // start serial for output
}

void loop() {
  Wire.requestFrom(8, 2);    // request 2 bytes from peripheral device #8
  index = 0;

  while (Wire.available()) { // peripheral may send less than requested
    if(index < 2) {
      char c = Wire.read(); // receive a byte as character
      inData[index] = c;
      index++;
    }
  }

  if (index > 0) {
    char * ptr;
    long dist;
    dist = strtol(inData, &ptr, 10);
    Serial.print("Distance: ");
    Serial.print(dist);
    Serial.println(" cm");
  }
  else {
    Serial.println("No data");
  }

  delay(500);
}
Code (Feather)
Click to see some code.
#include <Wire.h>

// DISTANCE SENSOR SETTINGS
#define TRIG_PIN  10 // Connect Arduino pin D10 to HC-SR04 pin Trig
#define ECHO_PIN  11 // Connect Arduino pin D11 to HC-SR04 pin Echo

// Distance sensor Variables
long duration;    // Sound wave travel duration
int distance;     // Distance measurement

void setup() {
  Serial.begin(9600);
  Serial.println("Initialising Feather with Ultrasonic Sensor HC-SR04");

  Wire.begin(8);                // join i2c bus with address #8
  Wire.onRequest(requestEvent); // register event

  pinMode(TRIG_PIN, OUTPUT);
  pinMode(ECHO_PIN, INPUT);
}

void loop() {
}

// function that executes whenever data is requested by controller
// this function is registered as an event, see setup()
void requestEvent() {
  distance = 0;
  char bufferDist[2];

  for (int i = 0; i < 5; i++) {
    digitalWrite(TRIG_PIN, LOW);
    delayMicroseconds(2);

     // Sets TRIG_PIN HIGH (ACTIVE) for 10 microseconds and then LOW (INACTIVE)
    digitalWrite(TRIG_PIN, HIGH);
    delayMicroseconds(10);
    digitalWrite(TRIG_PIN, LOW);

    // Reads the ECHO_PIN, returns the sound wave travel time in microseconds
    duration = pulseIn(ECHO_PIN, HIGH);

    // Calculating the distance
    distance += duration * 0.034 / 2;
  }

  int aveDist = distance/5;

  itoa(aveDist, bufferDist, 10);

  if (aveDist < 10) {
    bufferDist[1] = bufferDist[0];
    bufferDist[0] = '0';
  }

  Wire.write(bufferDist); // respond with message of 2 bytes
}
Wiring
The computer powers the Arduino via USB, and the Feather uses a 3.7 V Lithium battery connected to the JST jack.
See the Feathers power supply documentation for further details.
| Arduino Uno | Feather 32u4 | Step-Up Volt. | HC-SR04 |
|---|---|---|---|
| A4 | SCL | - | - |
| A5 | SCA | - | - |
| GND | GND | GND | GND |
| - | 10 | - | Trig |
| - | 11 | - | Echo |
| - | BAT | VIN | - |
| - | - | VOUT | Vcc |
Results
Once everything is connected you should start to see some values displayed in the Serial Monitor, coming from the Arduino.
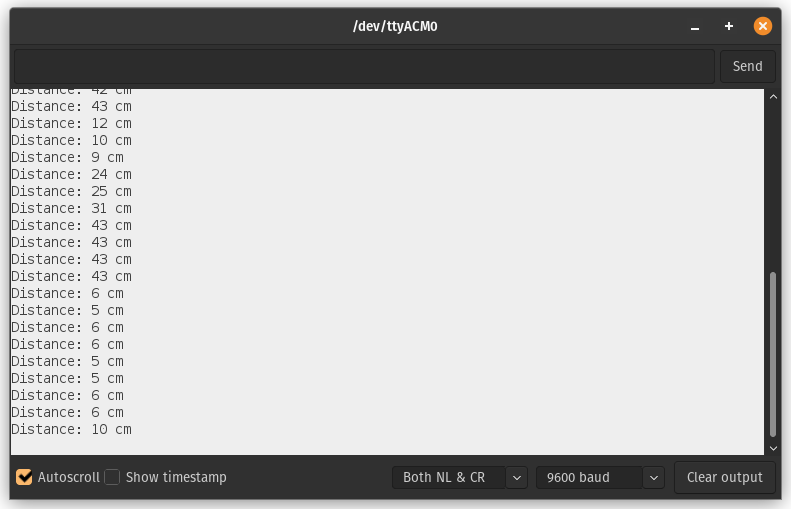
Well done!
Thank you for reading.


Comments ()