Building a Wi-Fi-Controlled Arduino Car
This is an older post from when this site covered general embedded learning. The site now focuses on modernising classic vehicles.
Introduction
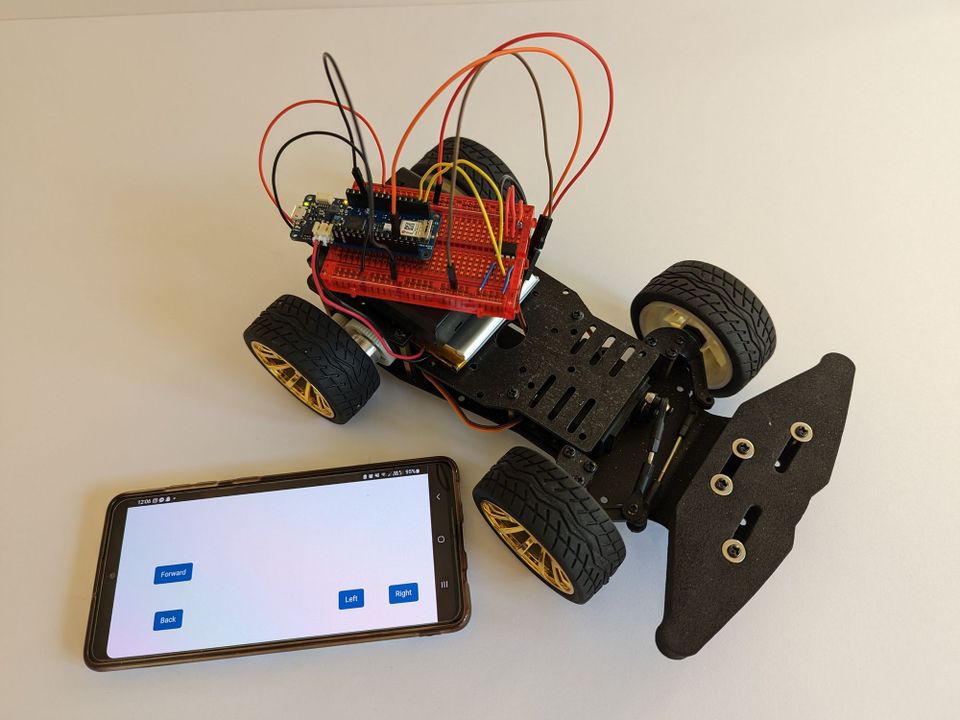
In this tutorial, we will use the MKR WiFi 1010, an H-Bridge and a servo motor to control our car through a regular browser (e.g. Chrome, Firefox). We’ll set up a simple web server, with the WiFiNINA library, as an interface for our board.
You can also watch the video I did on the process on YouTube.
Building a Wi-Fi-Controlled Arduino Car YouTube video
Components/Software Required
- Arduino MKR WiFi 1010
- L9110H H-Bridge Motor Driver
- Servo motor
- Batteries - 3.7v & 6v(4 x AA)
- A chassis
- DC motor
- Arduino IDE (online or offline)
- WiFiNINA library
- Breadboard
- Jumper wires
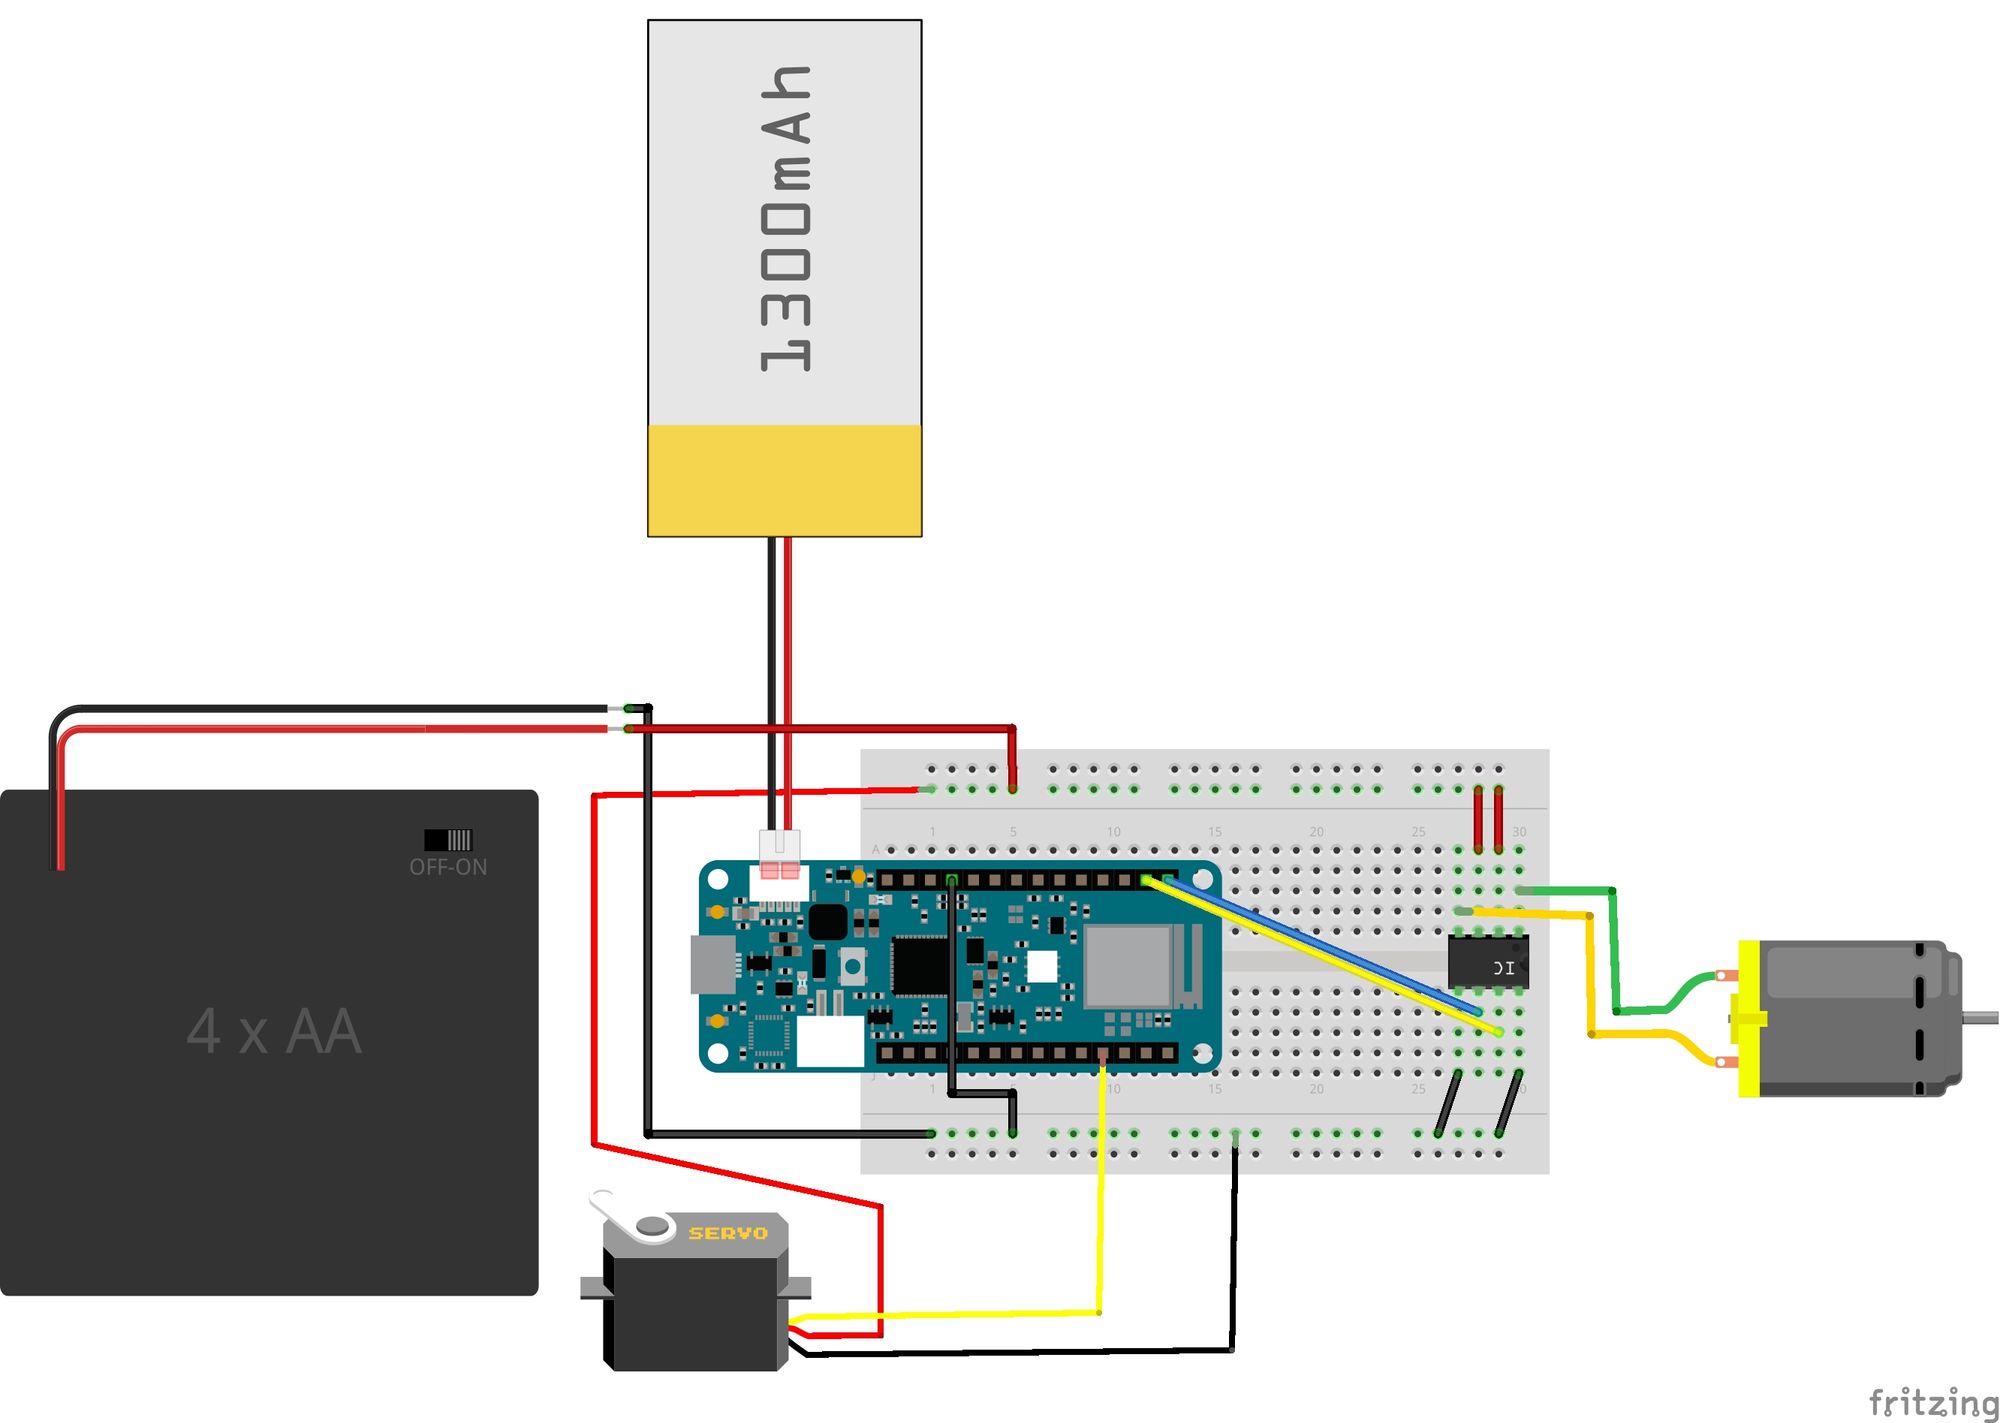
Circuit Diagram
Code
See the GitHub page.
Wiring
| L9110 H-Bridge | Arduino MKR | DC Motor | 6v Battery |
|---|---|---|---|
| OA | - | V+ | |
| VCC | - | - | V+ |
| VCC | - | - | V+ |
| OB | - | V- | |
| GND | GND | - | V- |
| IA | 6 | - | |
| IB | 7 | - | |
| GND | GND | - | V- |
| Servo | Arduino MKR | 6v Battery |
|---|---|---|
| Orange | 2 | - |
| Red | - | V+ |
| Brown | - | V- |
I initially tried to run everything with just the 3.7v battery, but it was not enough power. I, therefore, had to add the second power source, the 6v battery.
Setting Up the Required Code
- Make sure you have the driver installed. If you are using the Arduino Web Editor, you do not need to install anything. Otherwise, if you are using an offline editor, you’ll need to install it manually. This can be done by navigating to Tools > Board > Board Manager.... Look for the Arduino SAMD boards (32-bits ARM Cortex M0+) and install it.
- Next, you’ll need to install the WiFiNINA library. As before, if you are using the Arduino Web Editor, there is no need to install anything. If not, go to Tools > Manage libraries.., search for WiFiNINA and install it.
- Now that everything is set up, connect the board to the computer and upload the code to the board.
Getting the IP Address
When the code has been successfully uploaded, open the Serial Monitor (Tools > Serial Monitor), and after a few moments, you should see something like this appear:
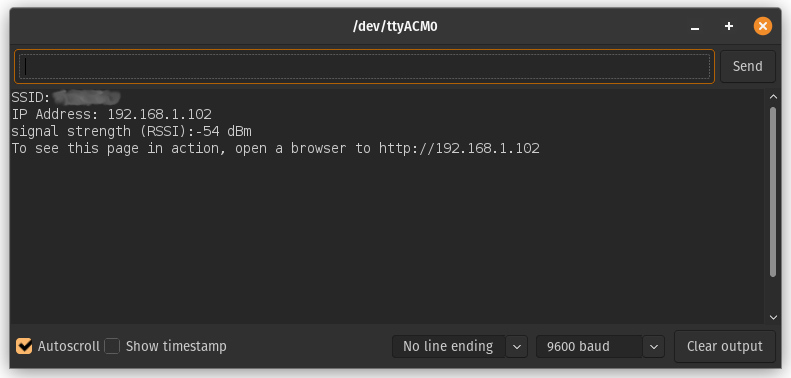
Here you can see the IP address of your car. Keep note of it.
Control the car from your browser
Now disconnect the board from the computer and connect the 3.7v battery to the Arduino.
Once the orange light on the Arduino is on, you know it’s connected to the WiFi.
Now copy or type the IP address into your browser, and you should see the controls. (Make sure it’s not HTTPS, only HTTP)
When playing with the buttons, you should see the car move forward/backwards and/or turn left and right, depending on what you click.
Video of Arduino car controlled through the browser
Have fun!
In this tutorial, we’ve managed to set up a simple web server on the Arduino MKR to allow us to control our car from the browser.
You can now hopefully use this example as a base to build something more complex. Also, if you are familiar with HTML and CSS, you can add or update the interfaces!
Troubleshoot
If the code is not working, there are some common issues we might need to troubleshoot:
- You need to install the latest firmware for the board.
- Not installed the WiFiNINA library.
- Entered the SSID and PASS incorrectly: it is case-sensitive.
- Wrong port selected to upload: depending on the computer we use, the board is sometimes duplicated. By simply restarting the editor, this issue can be solved.
- Make sure to connect the ground (GND) on the Arduino to the common ground; otherwise, you might get strange behaviour.
- Double-check you have the correct IP address; The IP address assigned to the car can change depending on your router.
Thank you for reading!


Comments ()